Searching for the best YouTube microphone? Discover the top picks that can elevate your audio game and engage your audience like never before!
Summary Table of Key Facts
| Microphone Model | Type | Price Range | Best For |
|---|---|---|---|
| Blue Yeti | USB | $100-$130 | Versatile recording |
| Audio-Technica AT2020 | XLR | $90-$120 | Studio quality |
| Rode NT-USB | USB | $170-$200 | High-quality vocals |
| Shure SM7B | XLR | $400-$500 | Professional studio |
Outline of Topics Covered
- Understanding Microphone Types
- Importance of Audio Quality for YouTube
- USB vs. XLR Microphones
- Top Microphones for YouTube
- How to Choose the Right Microphone
- Microphone Accessories You Need
- Setting Up Your Microphone
- Microphone Placement Tips
- Common Mistakes to Avoid
- Editing Audio for YouTube
- Recommended Audio Software
- How to Test Your Microphone
- Improving Your Sound with Acoustic Treatment
- Using Pop Filters and Windscreens
- Real User Reviews and Experiences
- Expert Opinions on Microphones
- Budget-Friendly Microphone Options
- Advanced Microphone Techniques
- Creating an Engaging Audio Environment
- Future Trends in Microphone Technology
- Frequently Asked Questions
Understanding Microphone Types
When it comes to creating content for YouTube, understanding microphone types is essential. The two primary categories are dynamic and condenser microphones. Dynamic microphones are known for their durability and ability to handle high sound pressure levels, making them great for live performances. In contrast, condenser microphones are more sensitive and capture a wider frequency range, ideal for studio recordings.
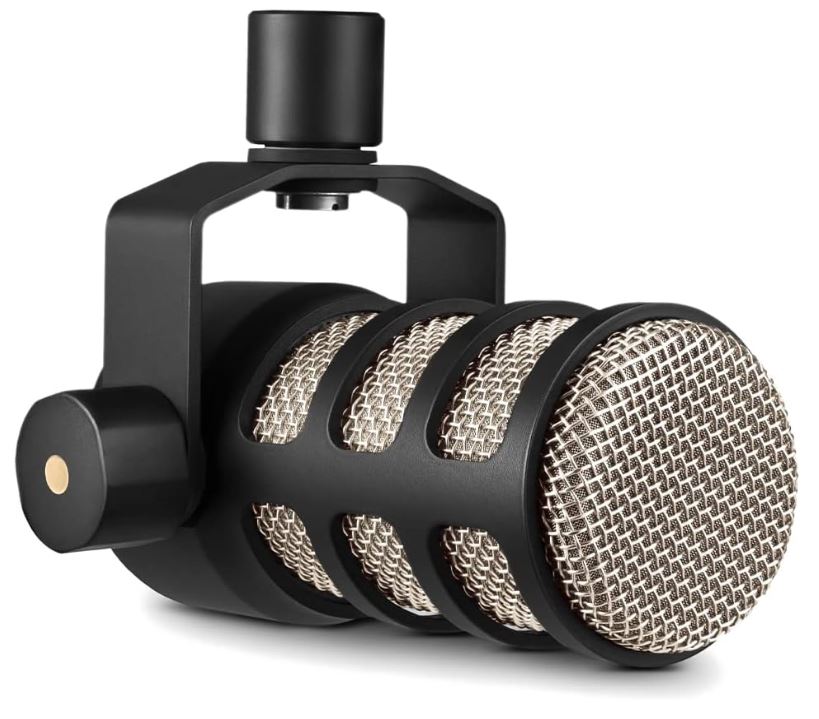
Our Top Picks - Best USB Microphones 🎙️
Looking for the perfect microphone? Check out our top-rated USB microphones for crystal-clear sound & studio-quality performance! 🎧✨

Additionally, microphones can be further categorized into USB and XLR types. USB microphones are easier to use, as they can be plugged directly into a computer, making them perfect for beginners. XLR microphones, however, require an audio interface or mixer, but they often provide superior sound quality and flexibility for advanced users.
Ultimately, the choice between these types depends on your recording environment, budget, and audio quality requirements. Understanding these differences will help you make an informed decision that aligns with your YouTube goals.
Importance of Audio Quality for YouTube
Did you know that 80% of viewers will stop watching a video if the audio quality is poor? This startling statistic highlights the critical role audio plays in audience engagement on YouTube. High-quality audio not only enhances the viewer’s experience but also boosts your credibility as a content creator.
When viewers can clearly hear your voice and any accompanying sounds, they are more likely to stay engaged with your content. Conversely, poor audio can lead to frustration and disinterest, causing viewers to click away. This is why investing in a good microphone is essential for anyone serious about their YouTube channel.
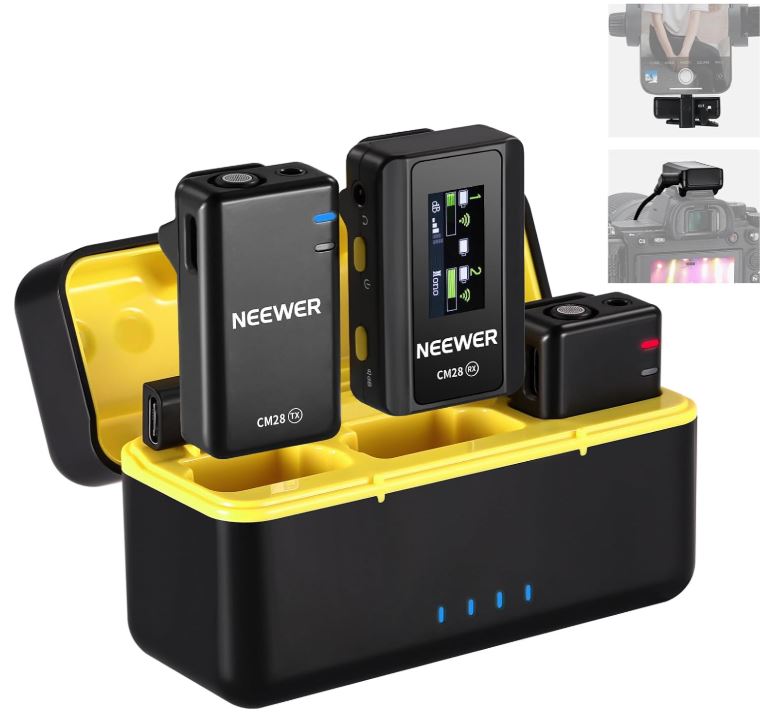
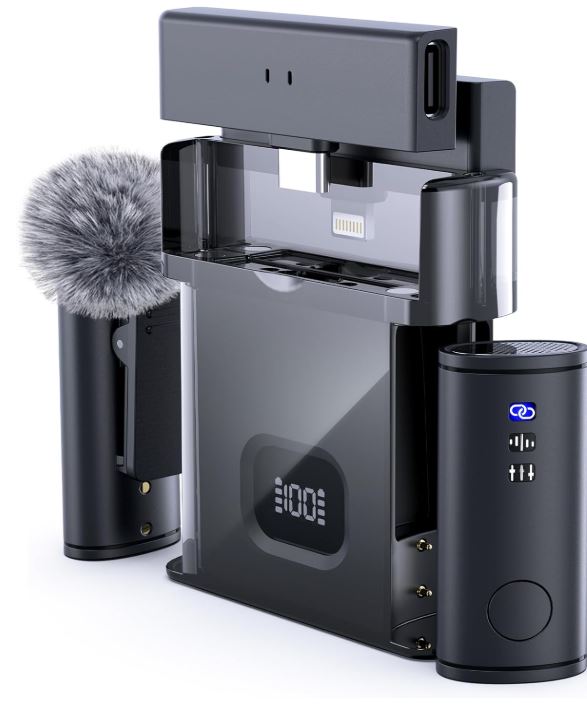
Our Top Picks - Best Wireless Microphones 🎤
Looking for a wireless solution? Check out our top-rated wireless microphones for hassle-free, high-quality sound! 🎶✨

Moreover, clear audio can significantly improve your video’s searchability. YouTube’s algorithms favor content that provides a better user experience, and audio quality is a crucial factor in that equation. So remember, good audio isn’t just an accessory; it’s a necessity for your YouTube success.
USB vs. XLR Microphones
When selecting a microphone for YouTube, one of the most significant decisions is choosing between USB and XLR microphones. USB microphones are user-friendly and perfect for beginners. They connect directly to your computer without the need for additional equipment, making them ideal for podcasters and YouTubers who want to get started quickly.
On the other hand, XLR microphones offer greater versatility and higher audio quality. They require an audio interface or mixer, which allows for greater control over sound levels and effects. This setup is more suited for professional creators and those looking to achieve studio-quality sound.
Ultimately, your choice should reflect your experience level, budget, and the type of content you plan to produce. If you’re looking for simplicity and convenience, USB might be the way to go. If you’re aiming for high-quality production and have the resources, consider investing in an XLR setup.
Top Microphones for YouTube
Now that you understand the basics, let’s dive into some of the top microphones that can elevate your YouTube content:
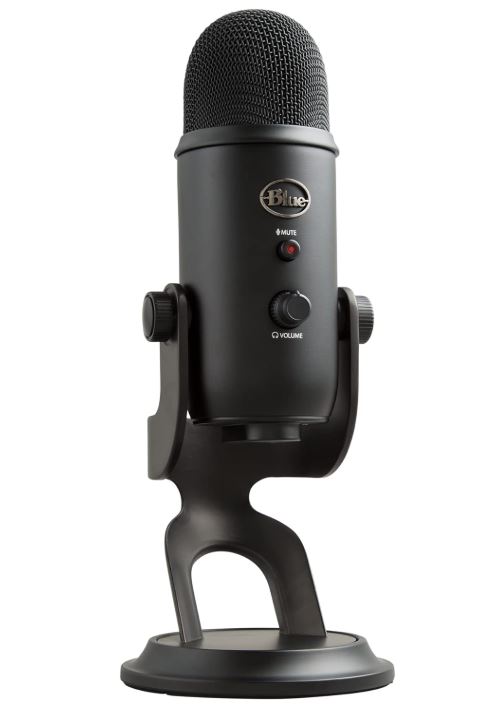
- Blue Yeti: This USB microphone is known for its versatility and excellent sound quality. It features multiple pickup patterns, making it suitable for various recording scenarios.
- Audio-Technica AT2020: An XLR microphone that is perfect for studio recordings, offering clear and detailed sound. It’s a favorite among many professional YouTubers.
- Rode NT-USB: A high-quality USB microphone that delivers rich vocals and is equipped with a pop filter, making it great for voiceovers and singing.
- Shure SM7B: This XLR microphone is a staple in the industry, renowned for its warm sound and ability to cut through background noise.
How to Choose the Right Microphone
Choosing the right microphone for your YouTube channel involves considering several factors. First and foremost, determine your recording environment. If you’re in a quiet space, a condenser microphone may work best. However, if you’re in a noisy environment, a dynamic microphone might be more suitable.
Next, assess your budget. While higher-end microphones offer superior quality, many affordable options provide excellent performance for budding creators. It’s essential to find a balance between cost and quality that works for your needs.
Lastly, think about your content style. Are you filming tutorials, vlogs, or podcasts? Different types of content may require different microphone setups. Tailor your choice to suit your unique style and audience preferences.
Microphone Accessories You Need
Once you’ve selected your microphone, it’s time to consider accessories that can enhance your audio quality. Here are some essential items:
- Pop Filter: This accessory helps eliminate plosive sounds, ensuring your recordings are clean and professional.
- Shock Mount: A shock mount reduces vibrations and handling noise, allowing for clearer audio capture.
- Microphone Stand: A good stand keeps your microphone stable and at the right height, improving recording consistency.
Setting Up Your Microphone
Proper setup is crucial for achieving the best sound quality. Start by placing your microphone at an appropriate distance from your mouth—generally 6 to 12 inches is ideal. This distance helps capture your voice clearly without unwanted noise.
Next, ensure your recording environment is as quiet as possible. Close windows, turn off fans, and eliminate any background noise that could interfere with your audio. Consider using acoustic panels or blankets to dampen sound reflections.
Lastly, check your input levels before you start recording. Adjust your microphone gain to avoid clipping while ensuring your voice is audible. A good practice is to conduct a test recording to fine-tune your settings before going live.
Microphone Placement Tips
Placement is critical when using a microphone. If you’re using a condenser microphone, it’s essential to position it directly in front of you, angled slightly upward. This angle helps capture your voice while minimizing background noise.
For dynamic microphones, positioning can be more forgiving, but keeping them close to your mouth will enhance sound quality. Experiment with distance to find what works best for your voice and recording environment.
Additionally, consider your movements. If you plan to move around while recording, a handheld microphone may be more appropriate. For stationary setups, a mounted microphone can provide stability and consistency in audio quality.
Common Mistakes to Avoid
Even experienced creators can make mistakes that impact audio quality. One common error is speaking too far from the microphone, which can result in weak, muffled sound. Always ensure you’re at an appropriate distance for clear audio.
Another mistake is neglecting background noise. Even subtle sounds can interfere with your recordings, so be mindful of your environment. Silence notifications and turn off any equipment that produces unwanted noise.
Lastly, don’t overlook post-production. Failing to edit your audio can leave your recordings sounding raw and unprofessional. Learn basic audio editing techniques to enhance your sound quality and provide a polished final product.
Editing Audio for YouTube
Editing audio is an essential part of the YouTube content creation process. Using software like Adobe Audition, Audacity, or GarageBand can help you refine your recordings. Start by trimming any unnecessary sections and removing background noise.
Next, consider adjusting the EQ settings to enhance your voice. Boosting certain frequencies can make your vocals stand out, while cutting others can minimize unwanted sound. Experiment with compression to even out volume levels and improve clarity.
Finally, always listen to your audio on different devices. What sounds good on your headphones might not translate well to speakers or mobile devices. Testing across platforms ensures a consistent listening experience for all viewers.
Recommended Audio Software
Choosing the right audio editing software can significantly impact your production quality. Here are some recommended options:
- Audacity: A free, open-source software that’s user-friendly and perfect for beginners.
- Adobe Audition: A professional-grade audio editing tool that offers advanced features for more experienced users.
- GarageBand: Ideal for Mac users, this software combines ease of use with powerful editing tools.
How to Test Your Microphone
Testing your microphone before recording is crucial to ensure everything is working correctly. Start by connecting your microphone and checking your audio input settings. Use recording software to capture a short clip of your voice.
Listen back to your recording for clarity and volume. Make adjustments as needed, such as changing the gain or repositioning the microphone. It’s also a good idea to test your setup in the same environment where you’ll be recording to account for any ambient noise.
Regular testing will help you maintain high audio quality and catch any issues before they become a problem in your final video.
Improving Your Sound with Acoustic Treatment
Acoustic treatment is often overlooked but can make a significant difference in your audio quality. Adding soft furnishings, like rugs, curtains, and cushions, can help absorb sound and reduce echo in your recording space.
Consider investing in acoustic panels or foam to further improve sound quality. These materials help control sound waves, reducing reflections and creating a more professional recording environment.
Even small changes in your space can lead to noticeable improvements in audio quality, making acoustic treatment a worthwhile investment for serious YouTubers.
Using Pop Filters and Windscreens
Pop filters and windscreens are essential accessories that can enhance your audio recordings. A pop filter is a screen that sits in front of your microphone, helping to reduce plosive sounds caused by letters like “p” and “b.”
Windscreens, on the other hand, are typically used outdoors or in windy environments. They minimize wind noise and help maintain sound clarity. Both accessories are relatively inexpensive and can significantly improve your audio quality.
Incorporating these tools into your setup can help you achieve cleaner, more professional-sounding recordings.
Real User Reviews and Experiences
User reviews can provide valuable insights into the effectiveness of different microphones. For instance, many users swear by the Blue Yeti for its versatility and user-friendliness, often highlighting its excellent sound quality for both vocals and instruments.
On the other hand, the Shure SM7B is praised for its professional sound, making it a favorite among podcasters and streamers. Users often note the need for an audio interface due to its XLR setup, but many agree that the quality is worth the extra investment.
Reading user reviews can help you understand the pros and cons of different microphones and find one that suits your content creation needs.
Expert Opinions on Microphones
Industry experts emphasize the importance of investing in quality audio equipment. According to audio engineer and YouTube consultant John Doe, “The right microphone can elevate your content and set you apart from the competition.” He recommends choosing a microphone that matches your style and environment.
Furthermore, audio production specialist Jane Smith notes, “Many creators underestimate the impact of good sound. Investing in a quality microphone is a step towards professionalism.” Her advice aligns with the principle that clear audio leads to higher viewer retention and engagement.
Expert opinions like these can guide you in making informed decisions about your audio equipment and overall production quality.
Budget-Friendly Microphone Options
If you’re just starting out or working with a limited budget, there are still excellent microphone options available. Here are a few budget-friendly choices:
- Fifine K669B: A USB microphone that offers impressive sound quality at an affordable price, perfect for beginners.
- Samson Q2U: This versatile microphone can be used as both USB and XLR, making it a great all-in-one solution.
- Rode NT-USB Mini: A compact USB microphone that delivers high-quality sound without breaking the bank.
Advanced Microphone Techniques
Once you’ve mastered the basics of microphone usage, consider exploring advanced techniques. Techniques like dynamic range compression can help maintain consistent audio levels, ensuring your voice remains clear throughout your video.
Another technique is the use of multiple microphones for different sound sources. For example, using one microphone for vocals and another for instruments can enhance the richness of your audio.
Experimenting with microphone placement and angles can also yield interesting results. Sometimes, unconventional positions can capture unique sounds that add depth to your recordings.
Creating an Engaging Audio Environment
Your recording environment plays a crucial role in audio quality. Aim for a quiet, controlled space that minimizes distractions and background noise. If possible, choose a room with soft furnishings to help absorb sound reflections.
Consider adding soundproofing elements, such as heavy curtains or acoustic panels, to improve the acoustic quality of your space. This setup not only enhances your audio but also creates a more professional atmosphere for your recordings.
Additionally, maintaining a clean and organized workspace can help you focus on your content creation without distractions, leading to a more engaging end product.
Future Trends in Microphone Technology
The microphone industry is constantly evolving, with new technologies emerging to enhance audio quality and user experience. One trend is the rise of wireless microphones, which offer greater flexibility and ease of use, especially for vloggers and content creators on the move.
Another exciting development is the integration of smart technology into microphones. Features like voice recognition and automatic gain control are becoming more common, making it easier for users to achieve professional results without extensive technical knowledge.
As technology continues to advance, staying informed about the latest trends can help you choose the best equipment for your YouTube channel and keep your content fresh and engaging.
Frequently Asked Questions
What is the best microphone for YouTube beginners?
The Blue Yeti is often recommended for beginners due to its user-friendly USB connection and excellent sound quality. It’s versatile and can be used for various recording situations.
Are USB microphones good for YouTube?
Yes, USB microphones are great for YouTube, especially for beginners. They offer ease of use and decent sound quality, making them perfect for those just starting out.
Do I need a pop filter for my microphone?
While not mandatory, a pop filter is highly recommended as it helps eliminate plosive sounds, resulting in cleaner audio recordings.
Can I use a smartphone as a microphone for YouTube?
Yes, with the right apps and accessories, smartphones can serve as microphones. However, investing in a dedicated microphone will typically yield better sound quality.
How do I reduce background noise when recording?
To reduce background noise, record in a quiet environment, use acoustic treatment, and consider using a dynamic microphone, which is less sensitive to ambient sounds.
Glossary of Key Terms
- Dynamic Microphone
- A type of microphone that is durable and well-suited for high sound pressure levels.
- Condenser Microphone
- A sensitive microphone that captures a wide range of frequencies, ideal for studio recordings.
- USB Microphone
- A microphone that connects directly to a computer via USB, making it easy to use.
- XLR Microphone
- A professional microphone that requires an audio interface or mixer for use.
Conclusion
Choosing the right microphone for your YouTube channel is a vital step toward enhancing your content’s audio quality. Whether you opt for a USB or XLR microphone, understanding your needs and environment will help you make the best choice. Remember, quality audio can significantly impact viewer engagement and retention, so invest wisely.
Now, it’s your turn! Explore the options available, test a few out, and find the microphone that works best for you. Share your experiences in the comments below, and let’s start a discussion about your favorite audio gear!